Hints & Tips
How to Clean Cork Lids on Retro Storage Jars
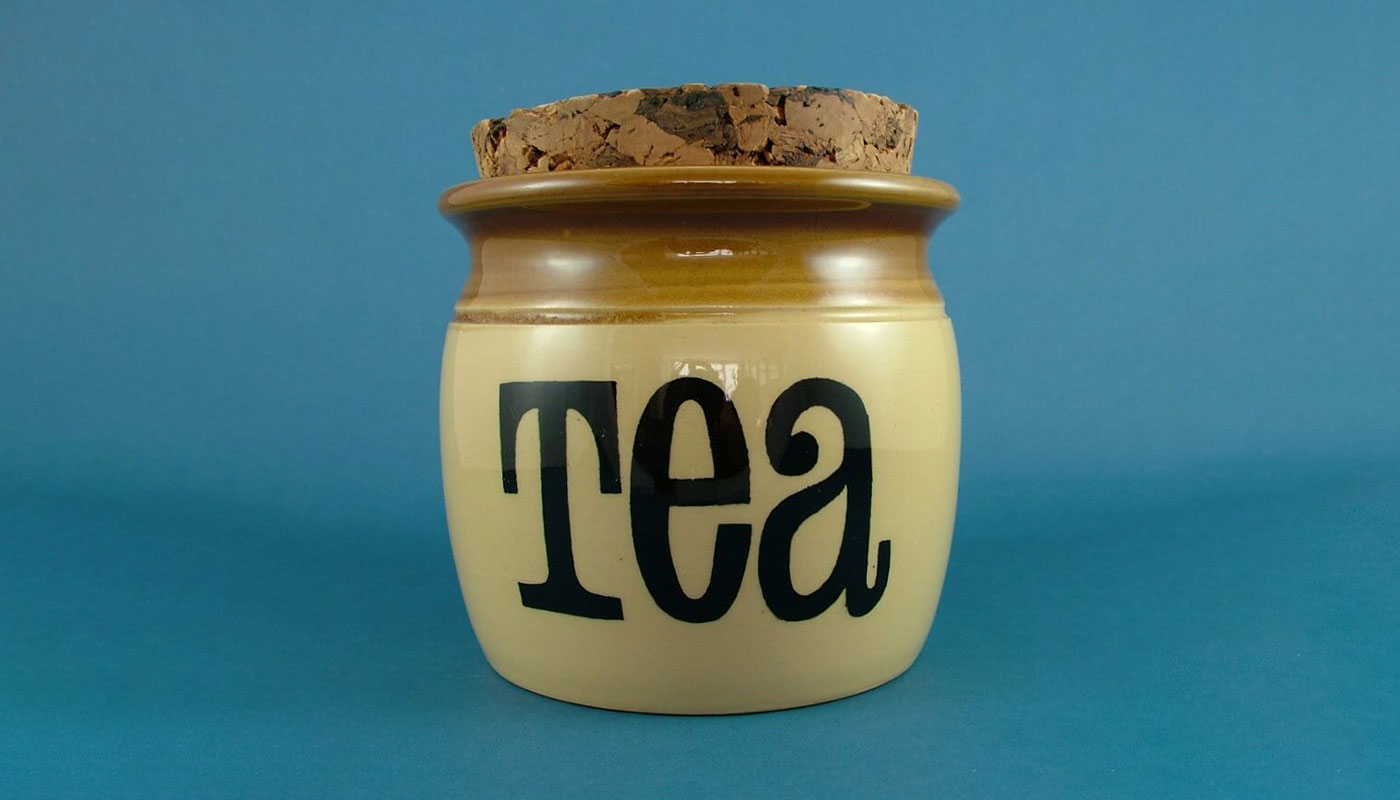
I recently bought some nice T. G. Green ‘Granville’ storage jars with their original cork lids. These pieces looked as though they’d not been washed since the day they’d been made! The ceramic jars were easy enough to clean in the washing-up bowl. The lids were so dirty, that they required a bit more thought. After a bit of trial and error, I found a great cleaning method for even the dirtiest of cork.
What is cork?
Cork is basically tree bark; the layer of dead protective cells found on the outside of a tree trunk. The primary source of commercially processed cork is Quercus Suber, or the cork oak. It is sustainable and environmentally friendly, as the tree is not harmed during the harvesting of the bark. It is also very versatile, which is why you’ll see it used in so many different industries.
Cork is hydrophobic, which means that it repels water. The strong cellular structure of the bark allows it to retain a very high percentage of air, which makes it lightweight (hence its buoyancy). This durable membrane also prevents the absorption of water, rendering it impermeable; this prevents degeneration when used in humid environments such as kitchens.
Another useful quality of cork caused by the cellular structure is its elasticity. No matter how much pressure is exerted on it, cork will return to the original shape. This creates an airtight seal when used in wine bottling, and for storage jars and canisters.
How do I clean cork?
While cork does not absorb dust, it can get coated in a layer of grease and grime when sat around in a kitchen. Many vintage canisters and storage jars have been heavily used and handled, adding to the build-up. This makes them less hygienic over time, and they can begin to look quite unsightly.
Cleaning them is really quite simple, and you’re bound to have the necessary bits already sitting in your kitchen cupboards!
You’ll need the following items:
-
- A bar of plain, scent-free hand soap
- A microfibre cloth
- Clean, warm water
- A tea towel


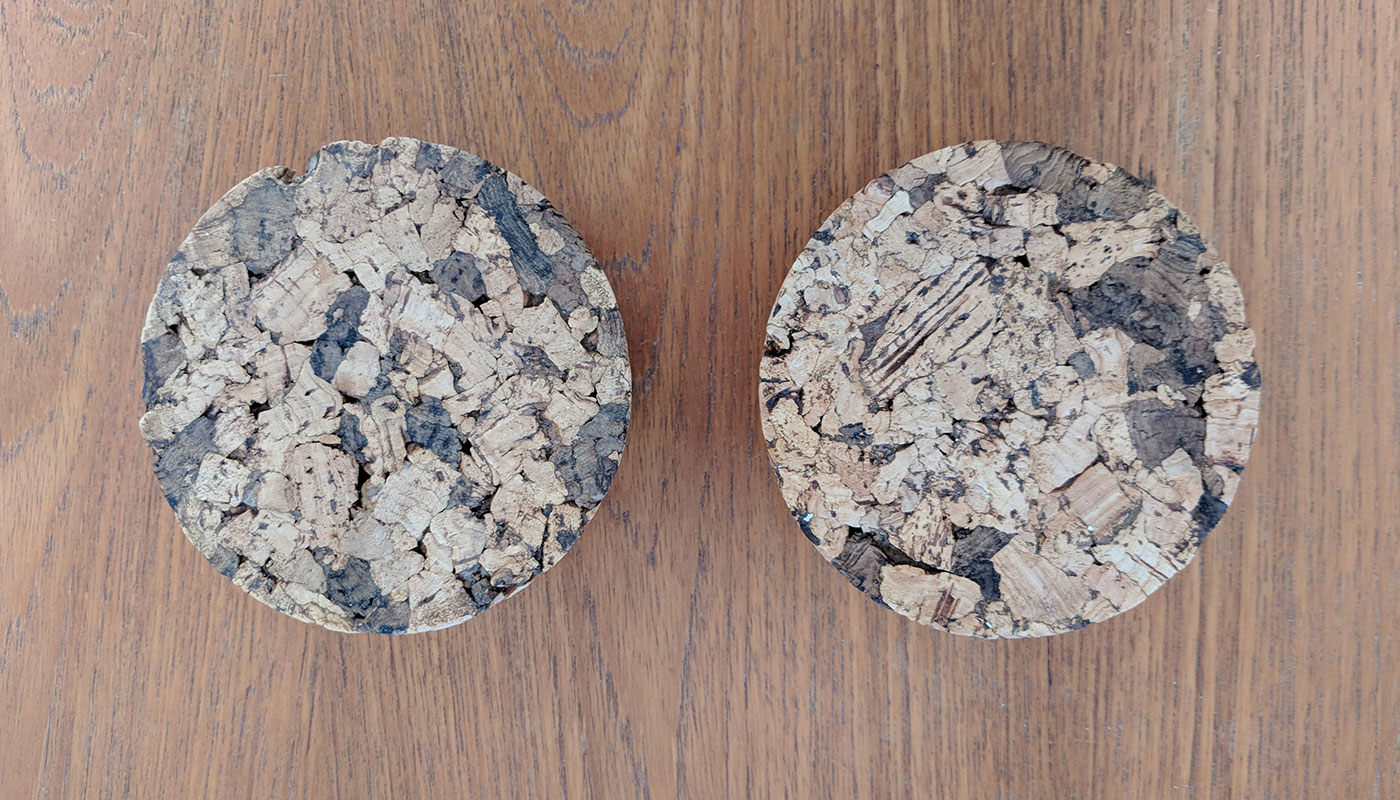
This first image shows the lids side by side; you can barely see the cork beneath the dirt. This cork is known as agglomerated; it has been man-made from smaller pieces of cork that have been bound together and moulded or extruded. For this reason, I would not recommend using harsh chemicals, as you do not know how they may react with the adhesive in it.
I wetted and then rung out the microfibre cloth, so that it was just damp. I then rubbed it onto the soap bar to get a thin film of soap on the cloth. I opted for plain, fragrance-free hand soap for a number of reasons:
-
- Fragranced soap may leave a scent that could taint the contents of the jar after cleaning
- Plain soap should not leave any marks or discolour the cork
- Hand soap is mild but effective at removing grease and dirt
- Good if you’re sensitive to harsh cleaning products
When applying the soap to the cork, I recommend doing it in a circular motion, whilst applying gentle pressure. Don’t scrub it; the agglomerated pieces may crumble if you rub it too hard and in the same direction. Circular motions also mean you’ll get into the crevices of the cork, where dirt and dust have settled. A microfibre cloth has a good textured finish, which will help with agitating the dirt from the surface. You’ll need to rinse your cloth regularly, so as not to spread any loose dirt around. It may take several goes but within a short space of time you’ll notice a huge difference.
If you find that you have a more ingrained stain or some discolouration, this can be removed by gently rubbing the stain with a fine sandpaper. Don’t forget to wear a protective face mask, and bear in mind that cork dust is very flammable!
Once you’re happy with it, give the cork a quick rinse under the tap and then gentle towel dry it. Although the cork does not absorb moisture, it is vital that you allow the piece to air dry before using it again. The surface moisture could provide a breeding ground for mould; I suggest placing it in a warm, ventilated place (I put it on a warm radiator) for 24 hours.

Et voila! Rejuvenated at no cost and with very little effort. You wouldn’t believe it was the same lid!


